Web ClockgeneratorWeb-Clockgenerator
Back to all projectsZurück zu allen Projekten
View the Project on GitHub Projekt auf GitHub ansehen c0de111/web_clockgenerator
Download uf2-file - for direct USB flashing uf2-Datei herunterladen - für direktes USB-Flashen
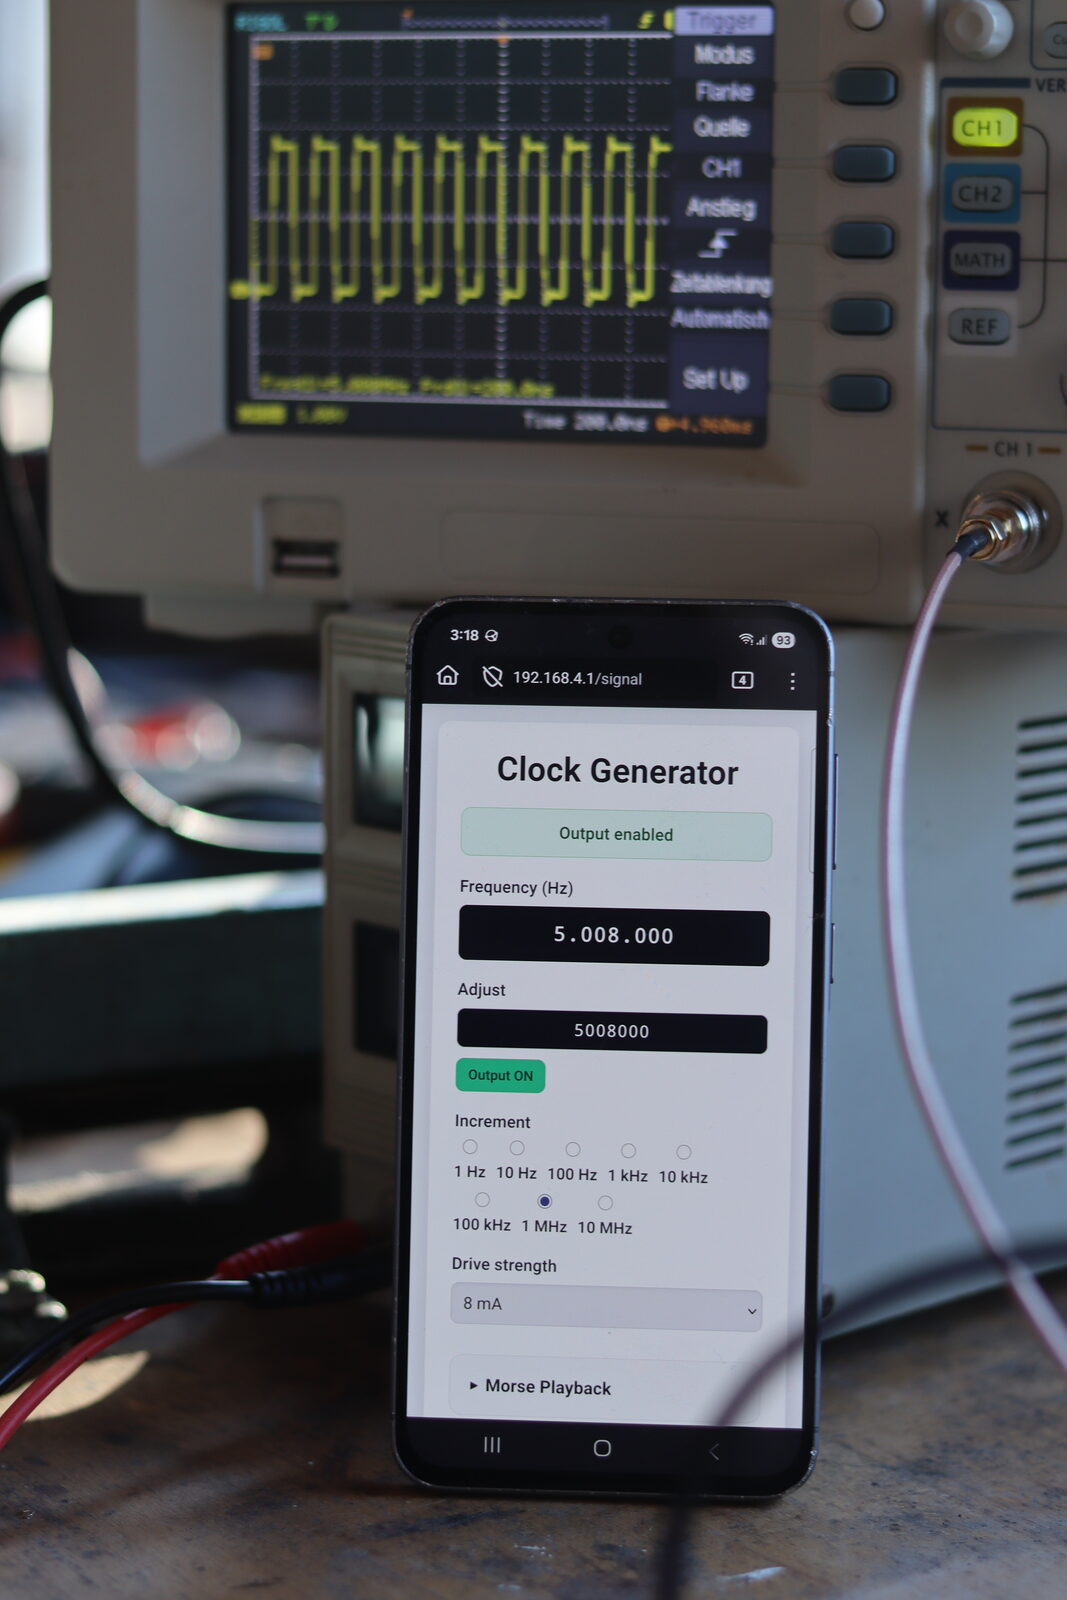
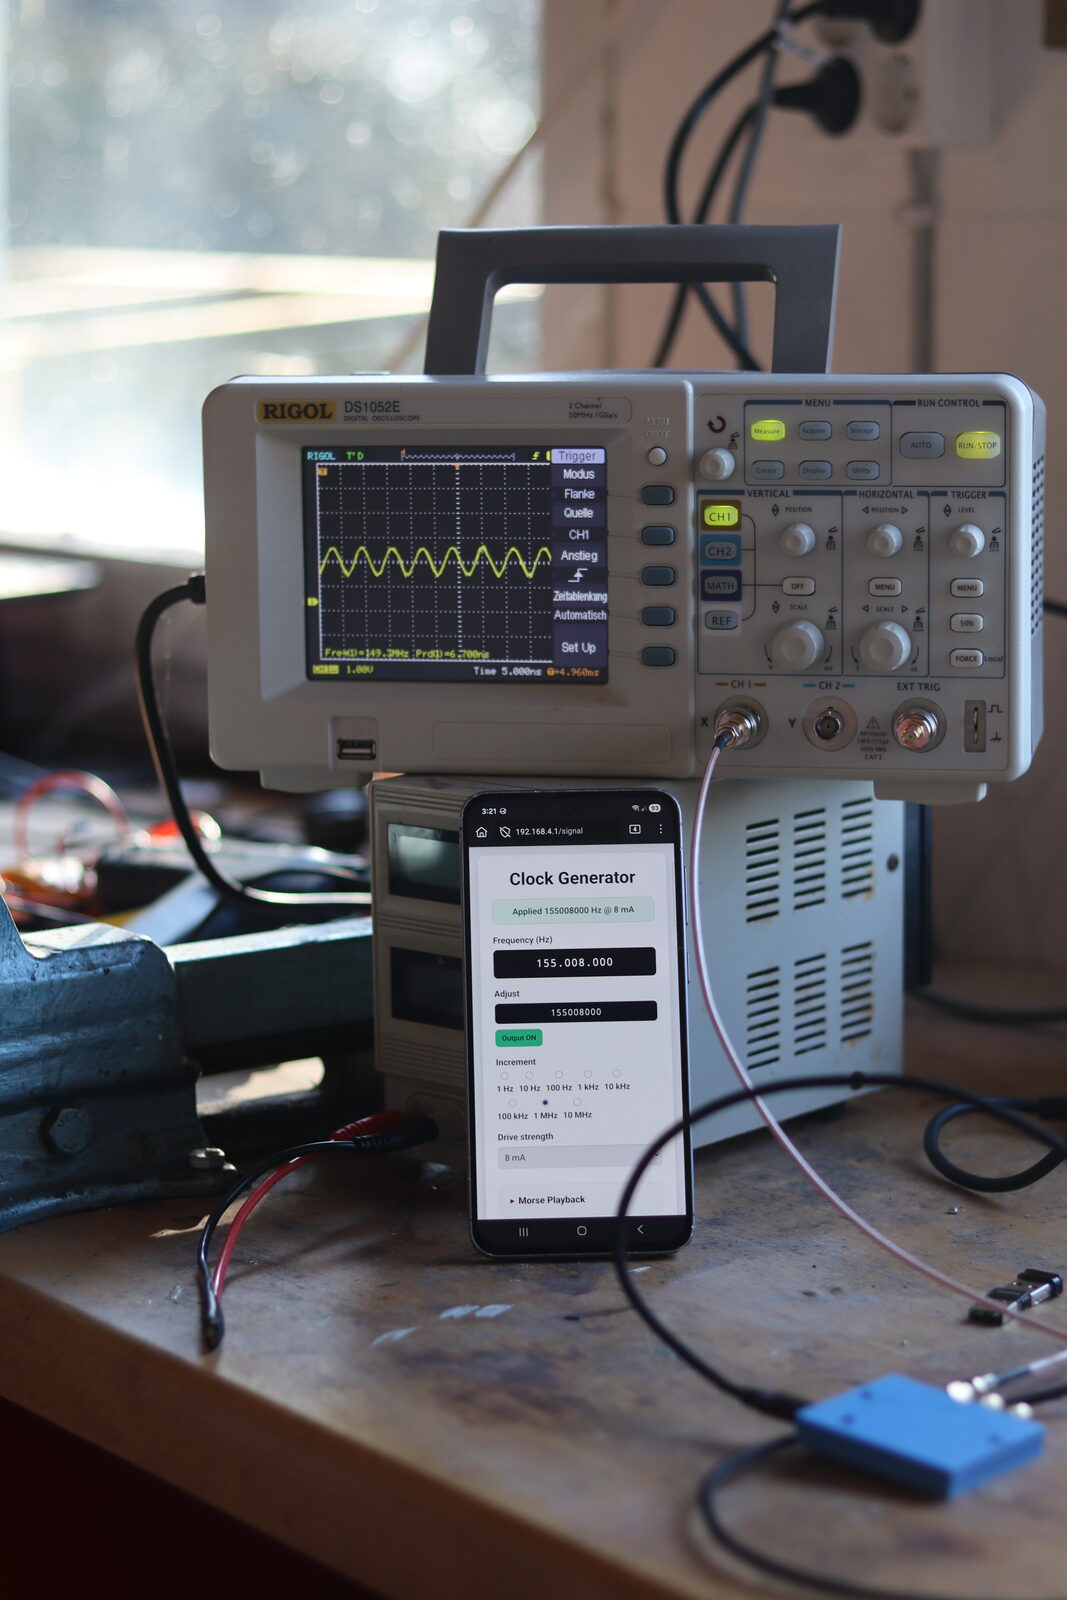
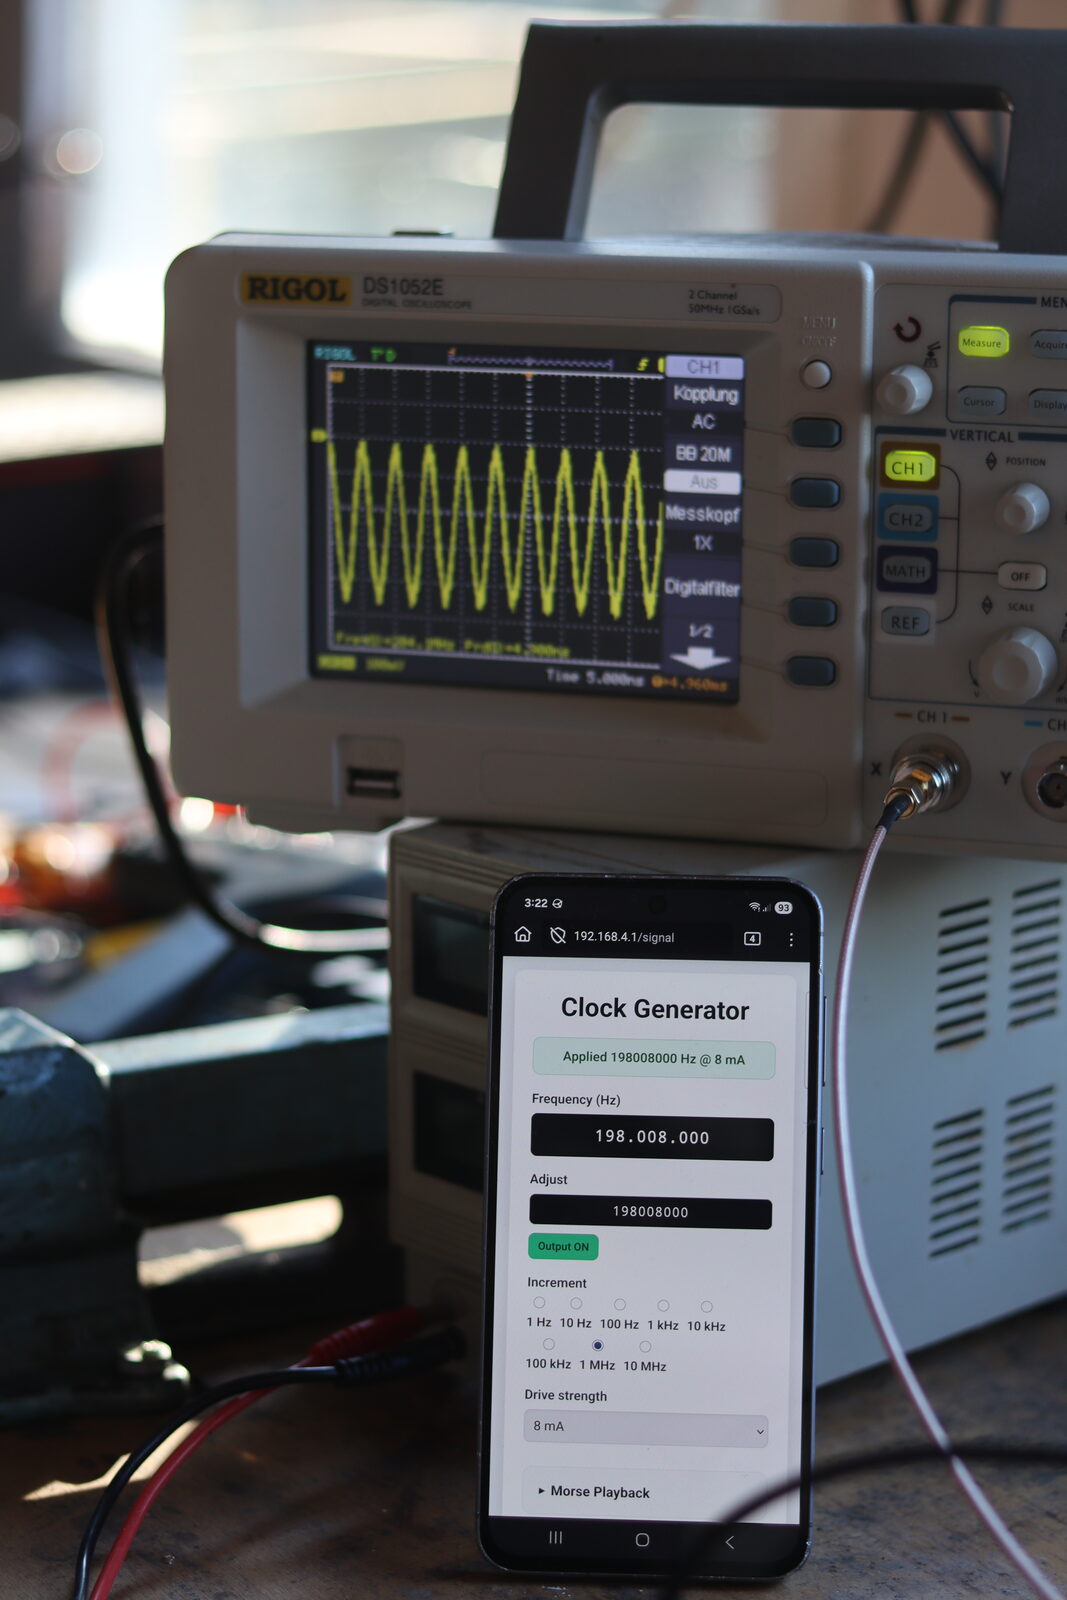
This project provides a compact WLAN-controllable signal source up to 200 MHz.
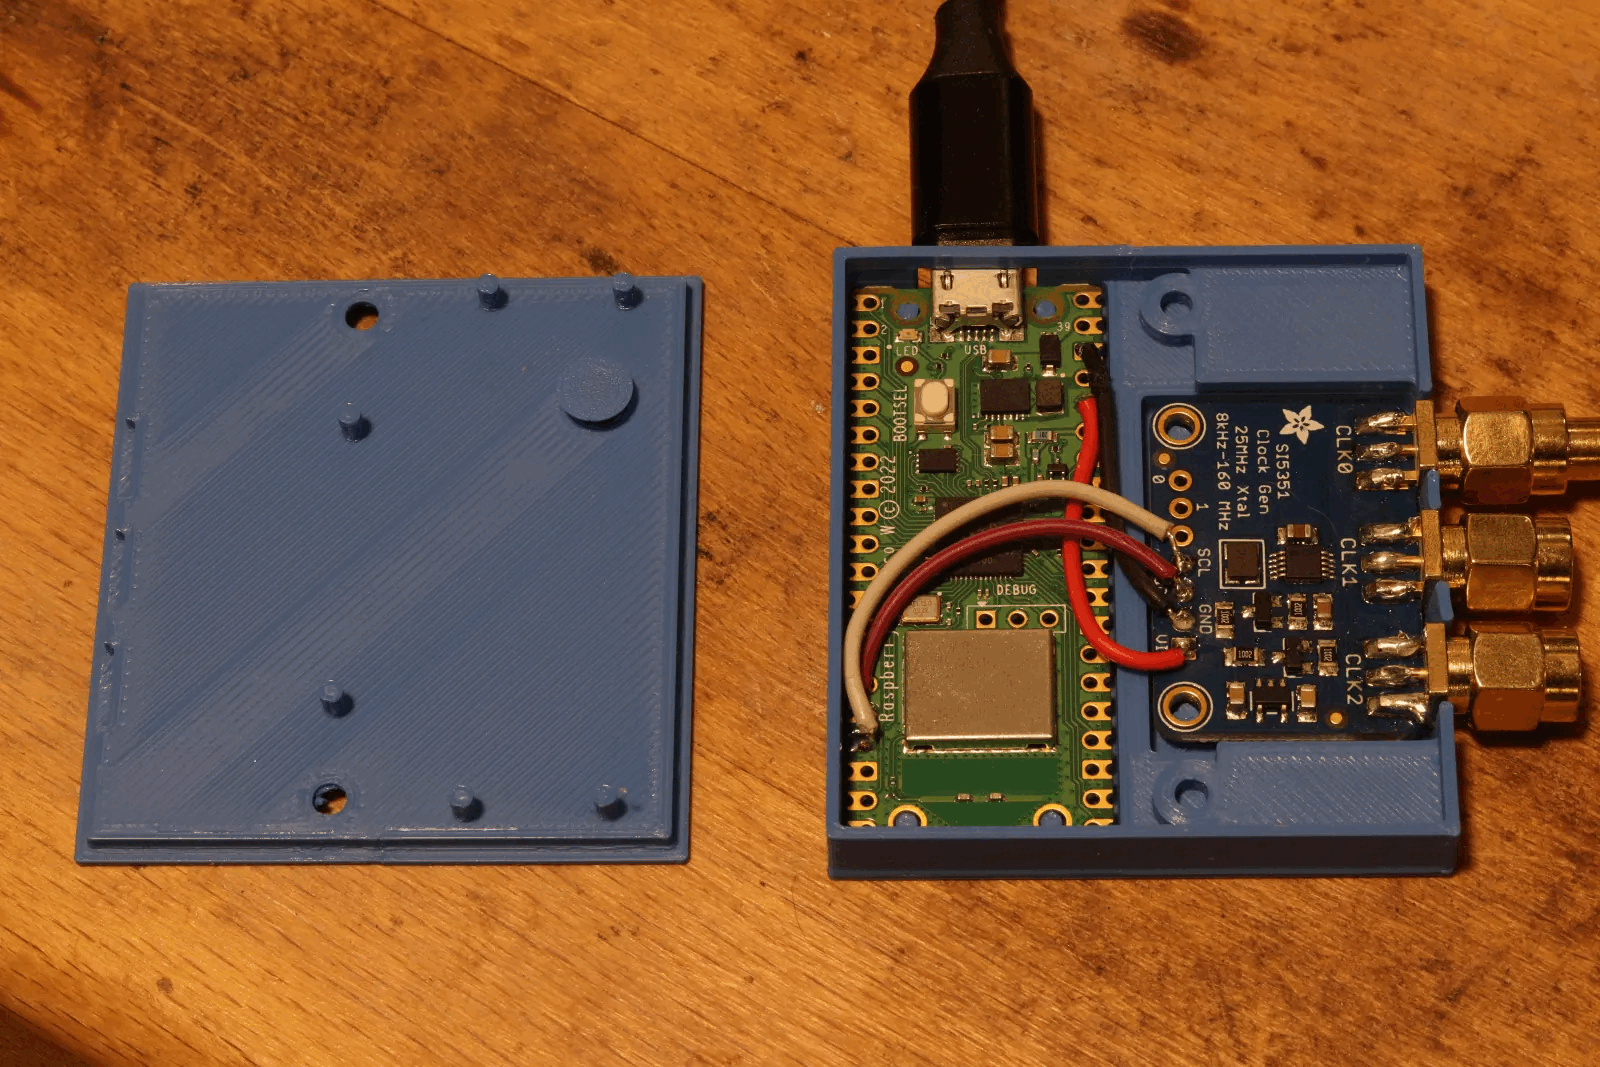
Using literally 4 wires, a Pico W and a Si5351 breakout board you get a very affordable and compact device. Custom firmware: The Pico W hosts its own WPA2 access point and serves a web interface to configure frequency and output behavior directly from the browser. Custom case: Tight 3D-printable case. Power supply: From USB.
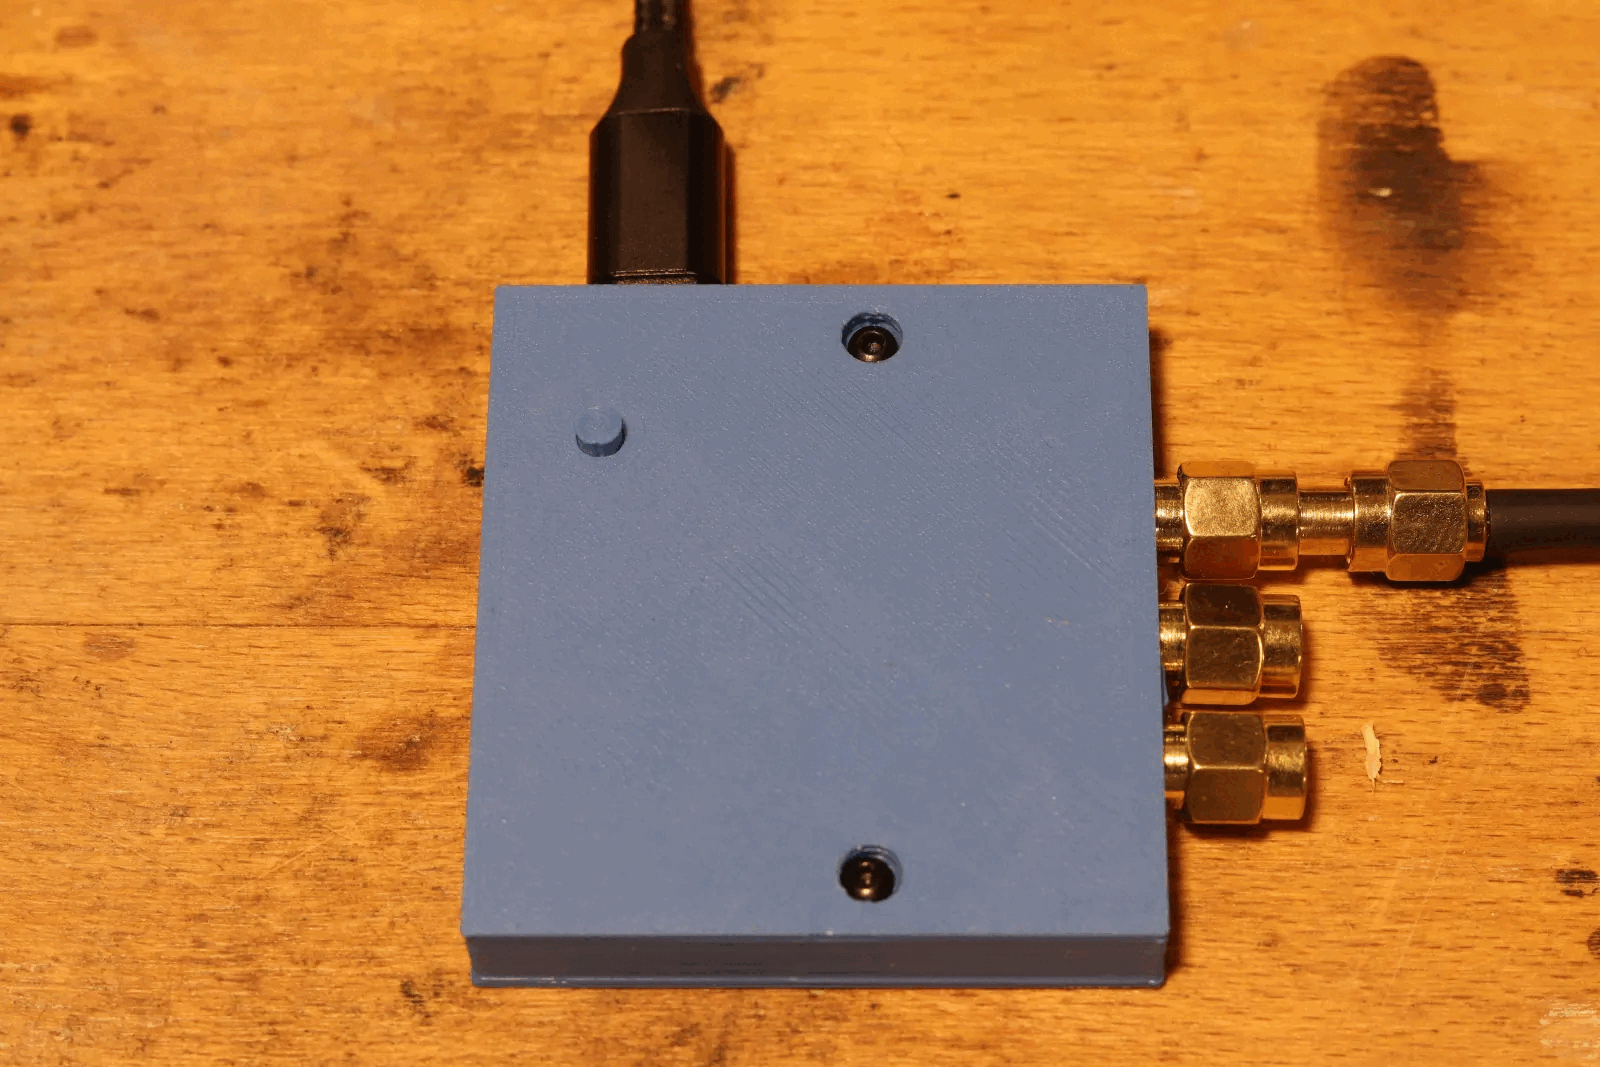
This provides a nice and easy to use high frequency signal source for your workshop, controllable with your cell phone. As you can see from the images, depending on what kind of signal you need, heavy filtering might be needed ;)
Overview
This project provides a compact WLAN-enabled signal source. The Pico W hosts its own WPA2 access point and serves a web interface to configure frequency and output behavior directly from the browser.
What it does
- Configure and output CLK0 frequency and drive strength from the web page.
- Enable or disable the output without reflashing firmware.
- Play Morse code on the configured carrier with adjustable speed.
- Provide runtime logs over USB CDC for debugging and verification.
Quick start
- Download the latest UF2: web_clockgen.uf2.
- Copy the UF2 to the Pico W in BOOTSEL mode.
- Join SSID
clockgenwith password12345678. - Open
http://192.168.4.1in your browser.
Build from source
export PICO_SDK_PATH=/path/to/pico-sdk
cmake -S . -B build -DPICO_BOARD=pico_w -DPICO_NO_PICOTOOL=1
cmake --build build
./create_uf2.sh build/web_clockgen.uf2
Hardware
- Raspberry Pi Pico W
- Si5351A module wiring: SDA to GP12, SCL to GP13, VCC to 3V3, GND to GND
- Optional enclosure parts in enclosure/
Photos
Repository
Source code, release files, and hardware details: github.com/c0de111/web_clockgenerator
Dieses Projekt stellt eine kompakte, WLAN-steuerbare Signalquelle bis 200 MHz bereit.
Mit buchstäblich 4 Drähten, einem Pico W und einem Si5351-Breakout-Board erhältst du ein sehr günstiges und kompaktes Gerät. Custom Firmware: Der Pico W betreibt seinen eigenen WPA2-Access-Point und stellt eine Web-Oberfläche bereit, um Frequenz und Ausgangsverhalten direkt im Browser zu konfigurieren. Custom Case: Enges, 3D-druckbares Gehäuse. Stromversorgung: Über USB.
Damit bekommst du eine schöne und einfach zu nutzende hochfrequente Signalquelle für deine Werkstatt, steuerbar mit deinem Handy. Wie man auf den Bildern sieht, kann je nach benötigtem Signal allerdings durchaus starke Filterung nötig sein ;)
Übersicht
Das Projekt stellt eine kompakte WLAN-Signalquelle bereit. Der Pico W betreibt einen eigenen WPA2-Access-Point und liefert eine Web-Oberfläche, um Frequenz und Ausgangsverhalten direkt im Browser einzustellen.
Was es macht
- CLK0-Frequenz und Drive-Strength direkt über die Webseite einstellen.
- Ausgang ein- und ausschalten, ohne die Firmware neu zu flashen.
- Morsecode auf der eingestellten Trägerfrequenz mit variabler Geschwindigkeit abspielen.
- Laufzeit-Logs über USB CDC für Debugging und Verifikation bereitstellen.
Schnellstart
- Aktuelles UF2 herunterladen: web_clockgen.uf2.
- UF2 im BOOTSEL-Modus auf den Pico W kopieren.
- Mit SSID
clockgenund Passwort12345678verbinden. http://192.168.4.1im Browser öffnen.
Build aus den Quellen
export PICO_SDK_PATH=/path/to/pico-sdk
cmake -S . -B build -DPICO_BOARD=pico_w -DPICO_NO_PICOTOOL=1
cmake --build build
./create_uf2.sh build/web_clockgen.uf2
Hardware
- Raspberry Pi Pico W
- Si5351A-Verdrahtung: SDA an GP12, SCL an GP13, VCC an 3V3, GND an GND
- Optionale Gehäuseteile unter enclosure/
Fotos
Repository
Quellcode, Release-Dateien und Hardware-Details: github.com/c0de111/web_clockgenerator